How to create an Alignment
See also What is an Alignment?
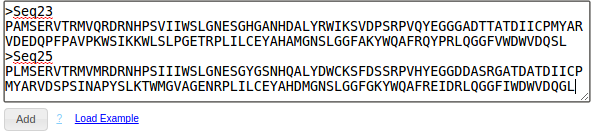
- Enter your Protein or DNA sequences into the text box and click the button "Add". Your new entry is added.
Enter at least two sequences to align together. If you don't have any sequences and just want to try it out, you can import some example sequences by clicking on "Load Examples", next to the "Add"-Button.
You can enter your sequences one by one or as Multi-FASTA together. See Help>Sequence Import for more details
on how to import sequences.
- Select all your entries that you want to convert by clicking on them. Selected entries change the background color.
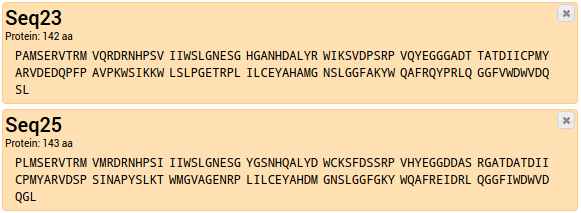
To deselect an entry, click on it again; the background changes to white again. Select at least two sequences to produce an alignment.
For more details about selecting entries see Help>Selecting entries
Help>Renaming entries describes how to change an entry name.
- After selecting your entries, choose the appropriate command in the tool bar: "Create Alignment > MUSCLE".
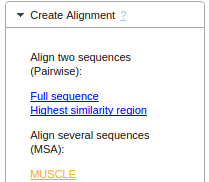
For a detailed explanation of the options "Full sequence (CFE Alignment)", "Highest similarity region (Local Alignment)" and "MUSCLE (Multiple Sequence Alignment)", see the Tool documentation.
A new alignment entry is added to your project.
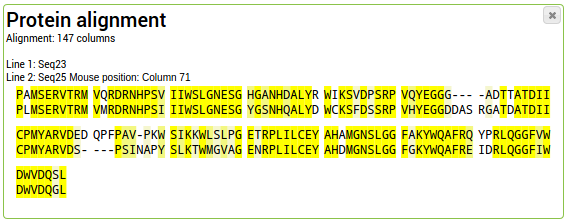
The yellow markings represent conservation of the respective column.
-
Alignments can be furthered analyzed by creating consensus sequences, phylogenetic trees or a sequence logo.
This is described on the next tutorial: Tutorial > Analyze Alignments.
For an explanation about Alignments see What is an Alignment?
Back to Documentation index